Creating a 3D logo
with Tridiv
Go to tridiv.com
Click 'Start using the app'
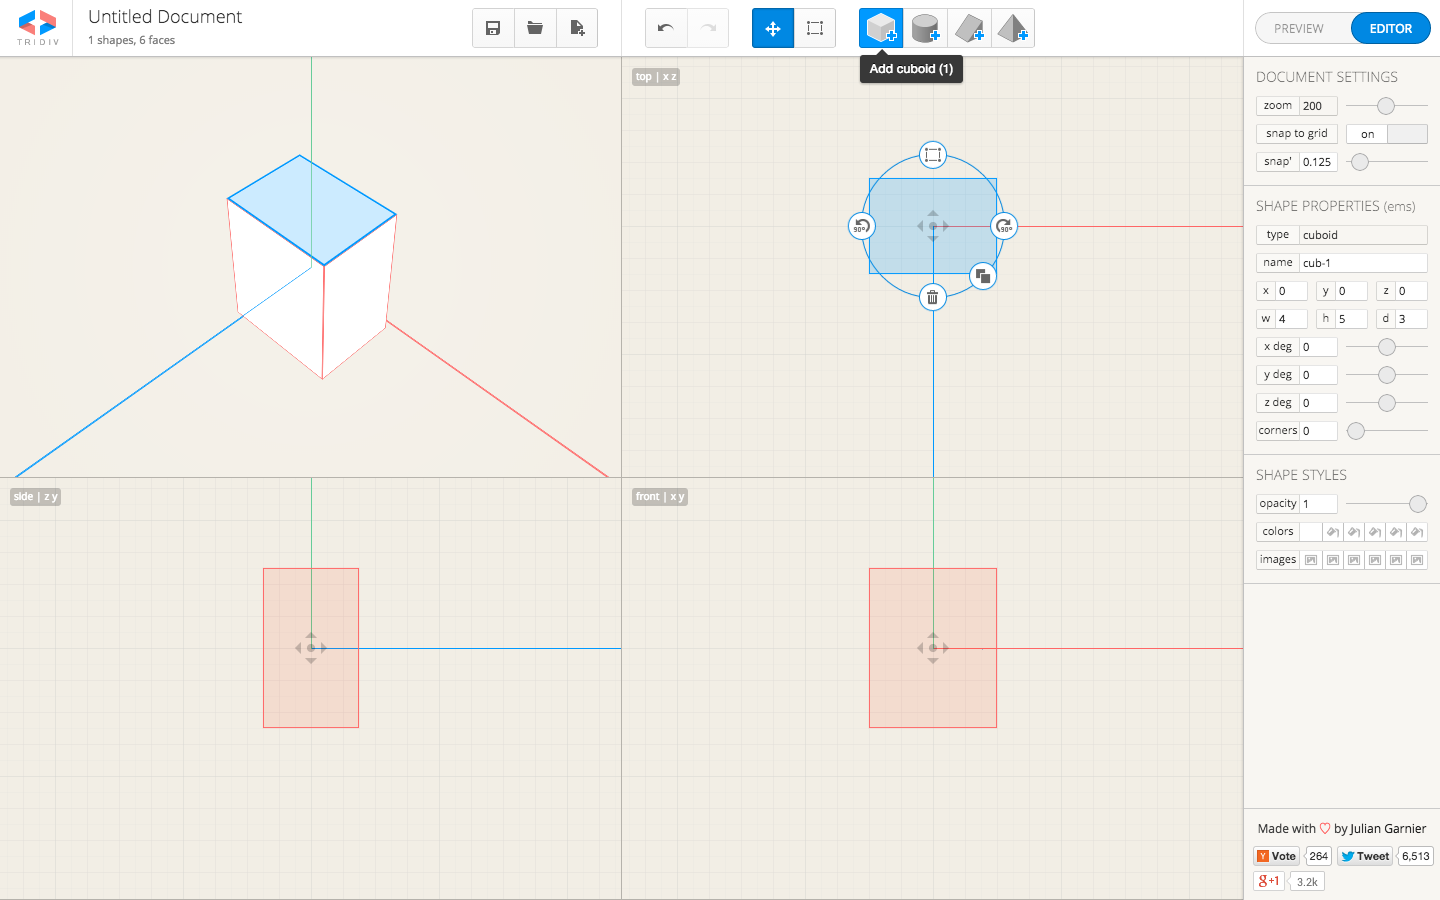
3D View
Top View
Side View
Front View
Document options ^
(Save, open, new)
^ Shape options
^
^
Move and edit shapes
<--------------------- X axis ------------------------------------------------------------->
^
|
|
|
|
|
|
|
|
|
|
Y axis
|
|
|
Adjust your settings
- Zoom = 200
- Snap to grid = on
- Snap value = 0.125

Getting Started
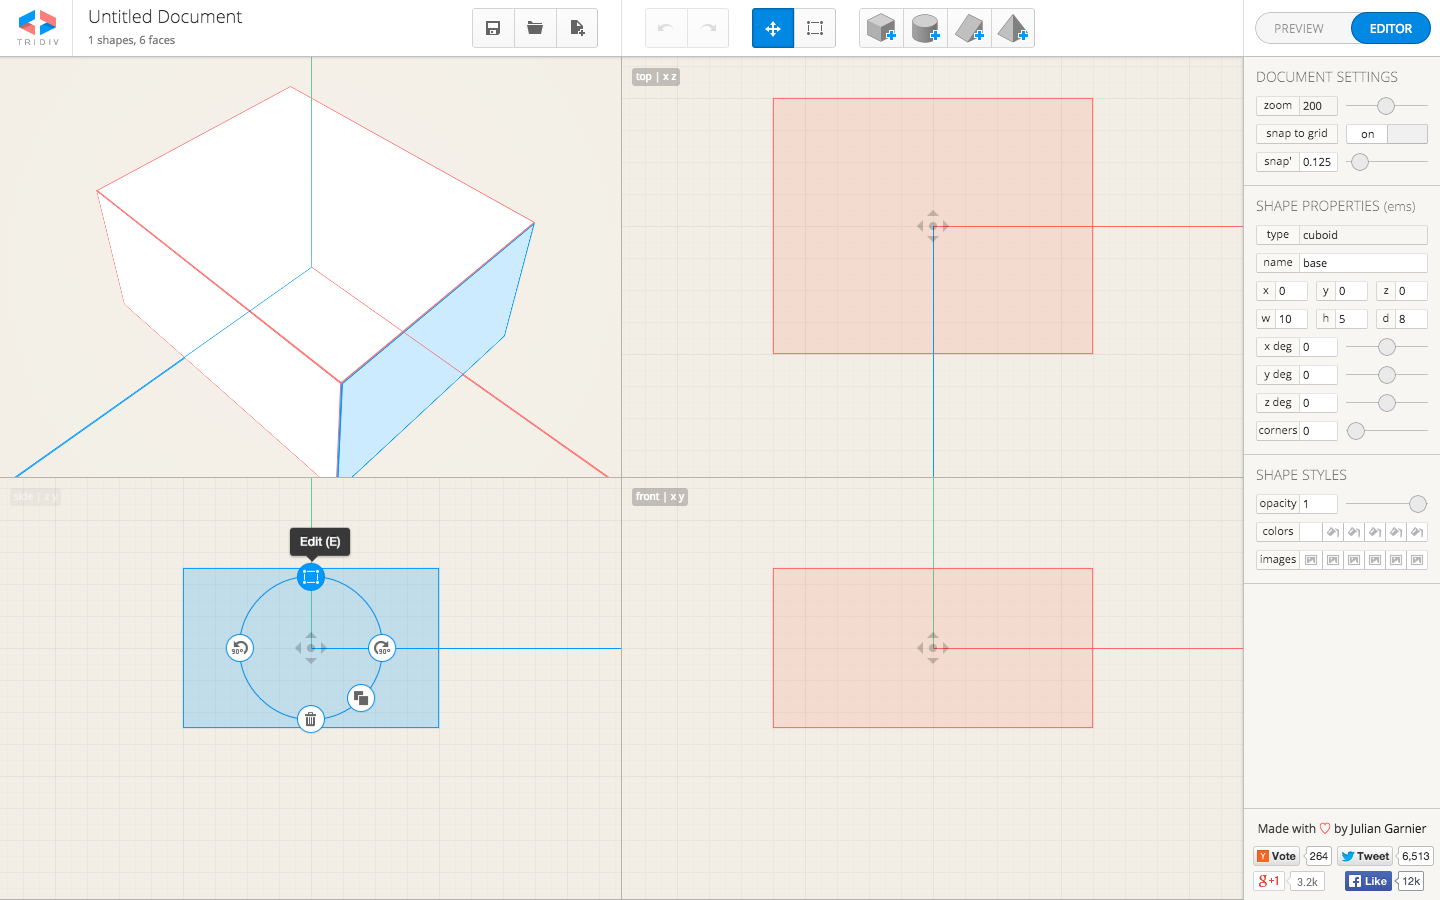
- The base of the turntable is a 'cuboid'
- So, click Add cuboid
- Rename it 'base':
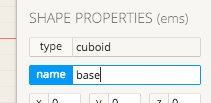
Click Edit
- You can either click the icon or just click 'E' as your shortcut.
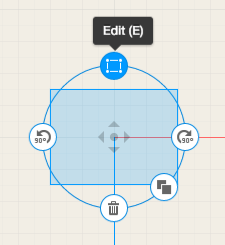
- Adjust the width (w) to 10 and the depth (d) to 8. (See picture below.)
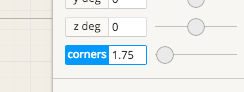
Now The Height
- Click the image in Side view
- Drag the Height (h) to 2, and the corners to 1.75:
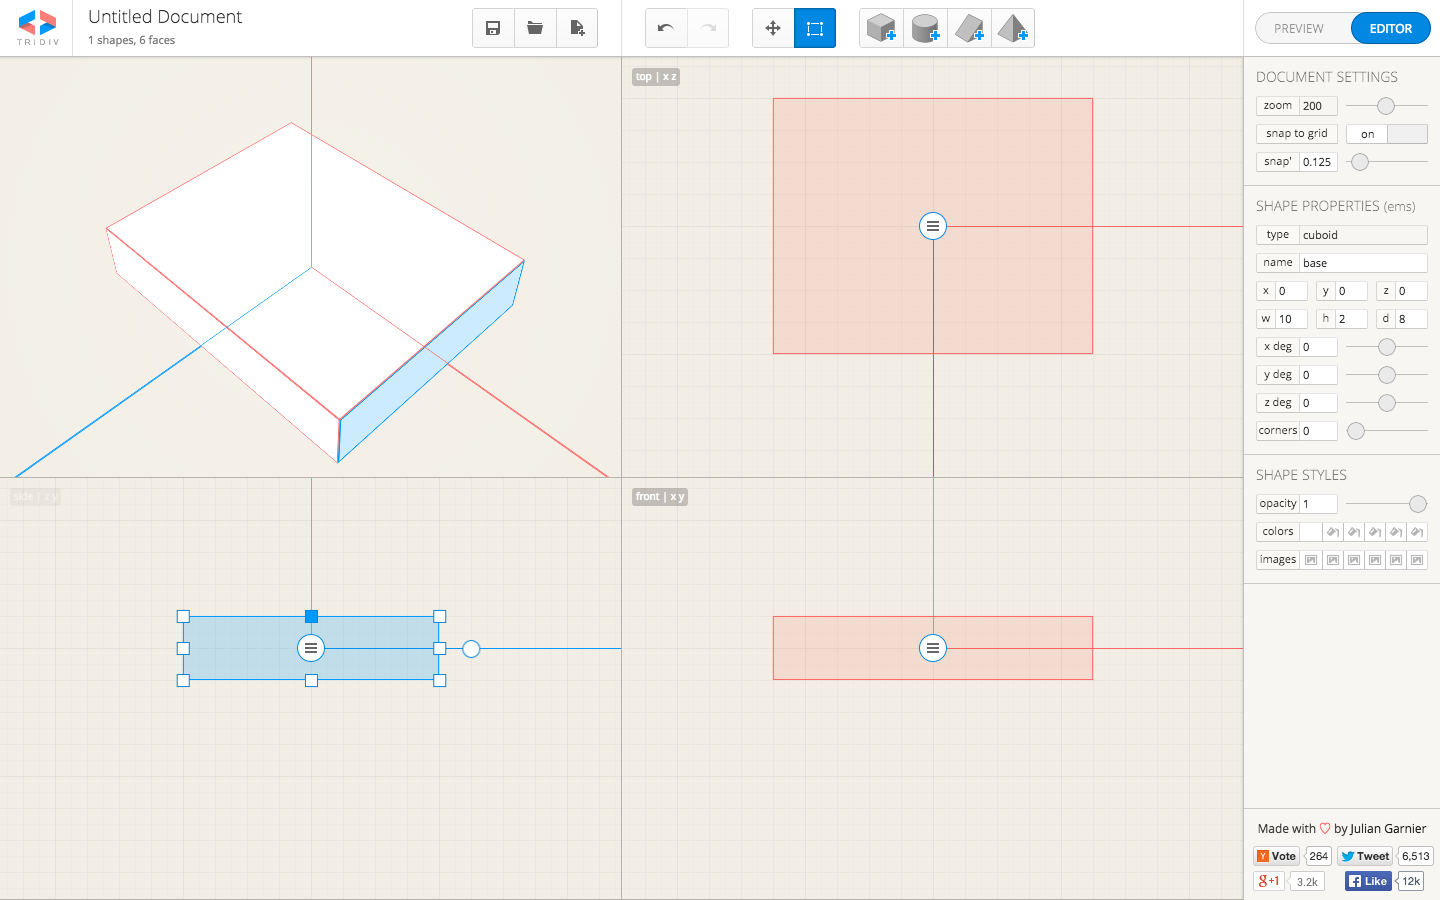
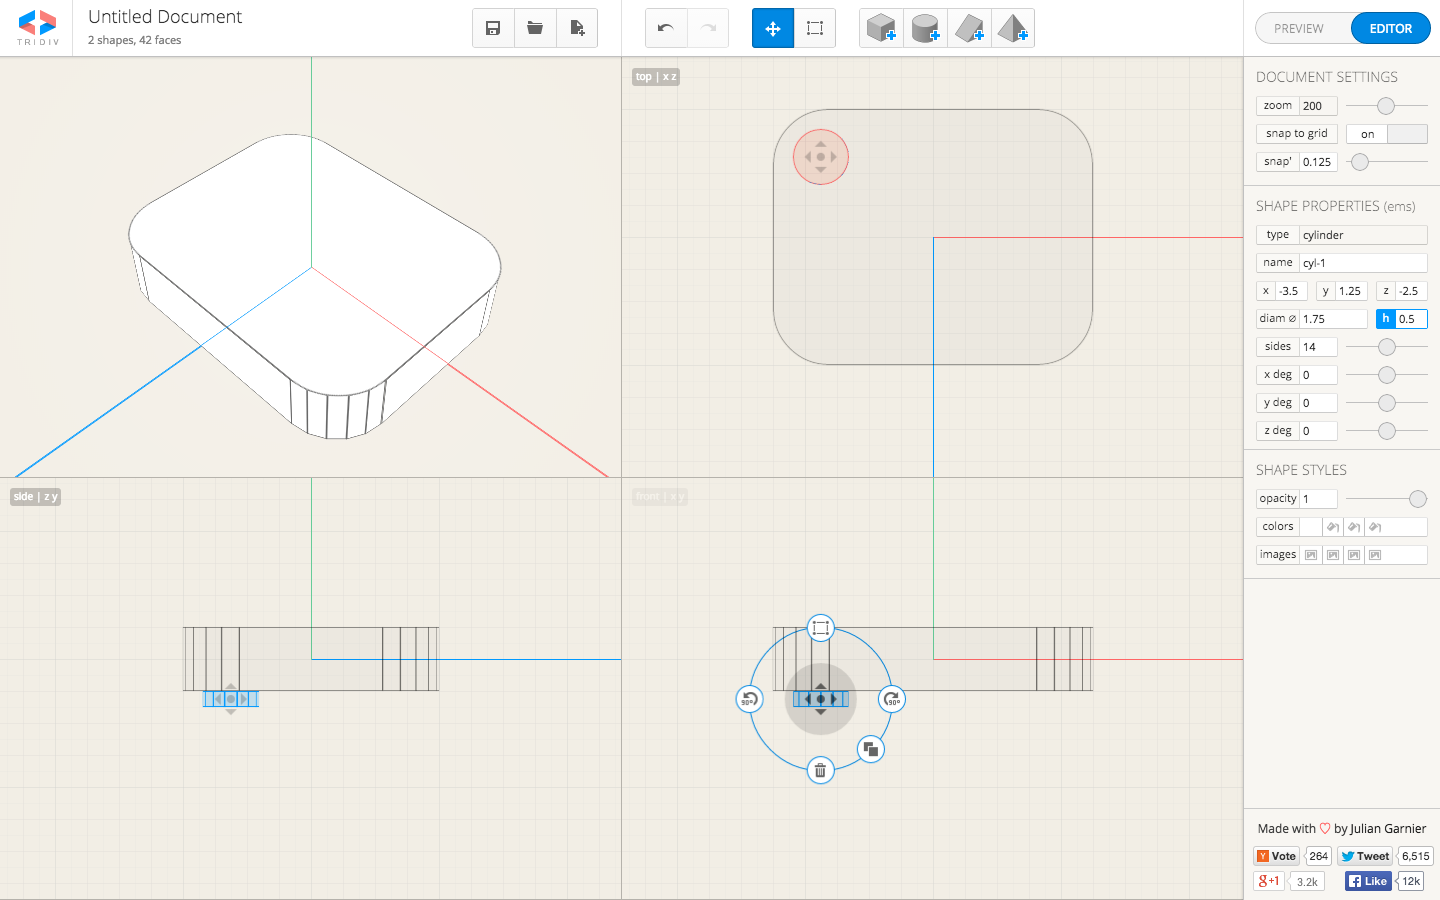
It should look like this now
Add the Feet
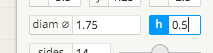
- Add a Cylinder shape
- Give it a diameter (diam) of 1.75 and a height (h) of 0.5.
- Finally, using the different views (top, side, front) as necessary, position the leg under the base, near the base's corner.
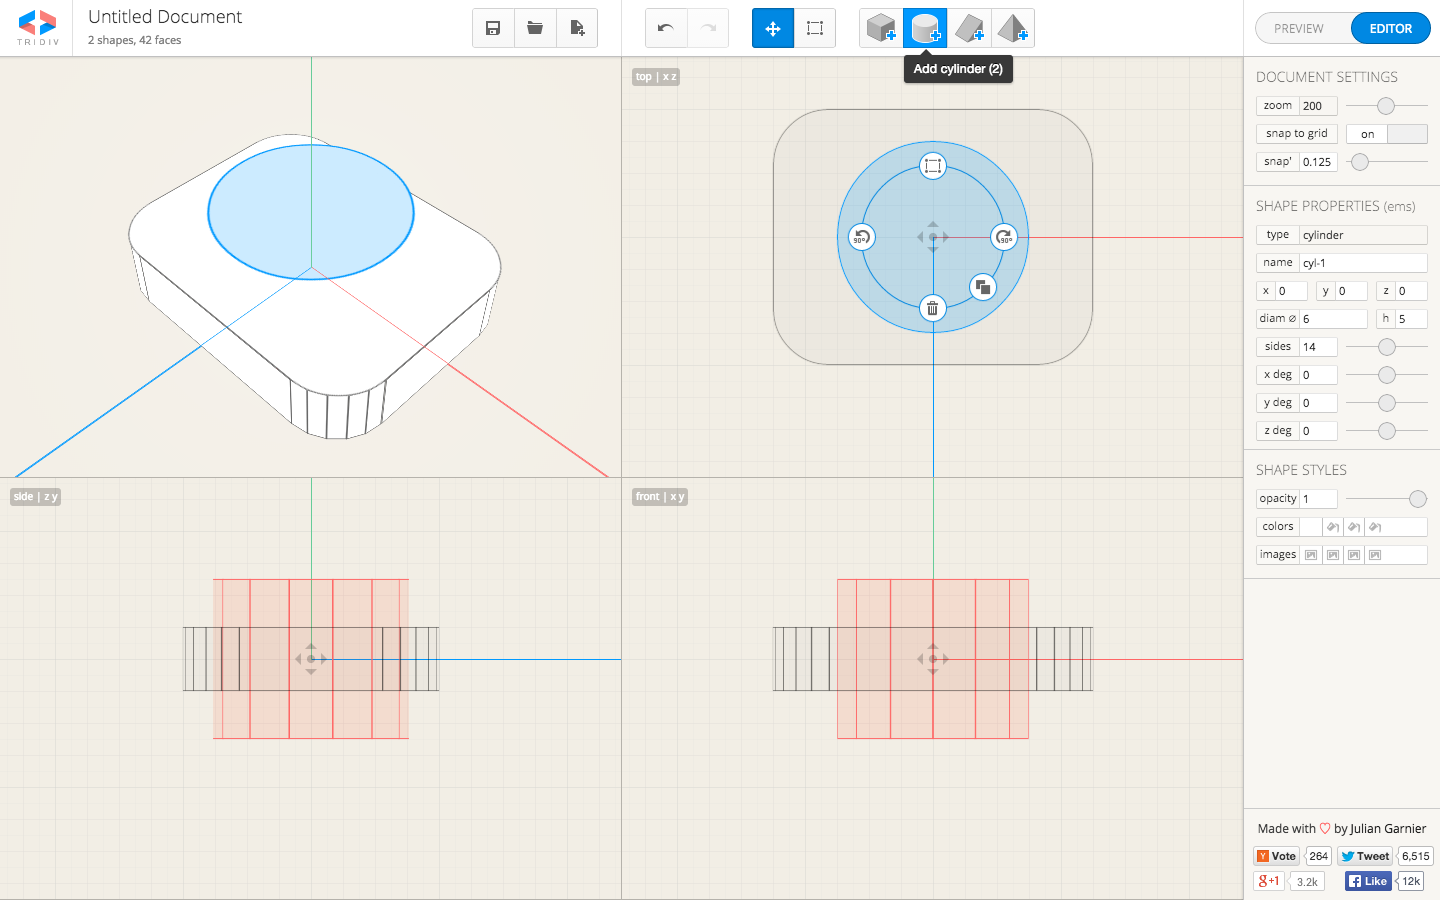
It should look like this now
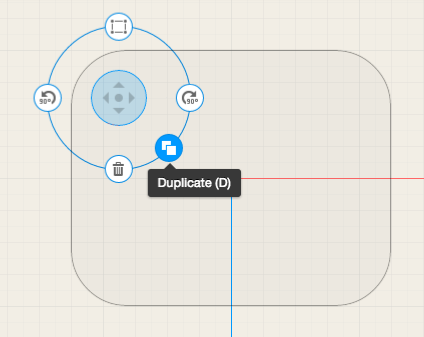
Duplicate
- Click on your Foot to bring up the ring of tools. Click Duplicate (or just press 'D').
- Position this in another of the bases corners.
- Repeat till you've got all four feet.
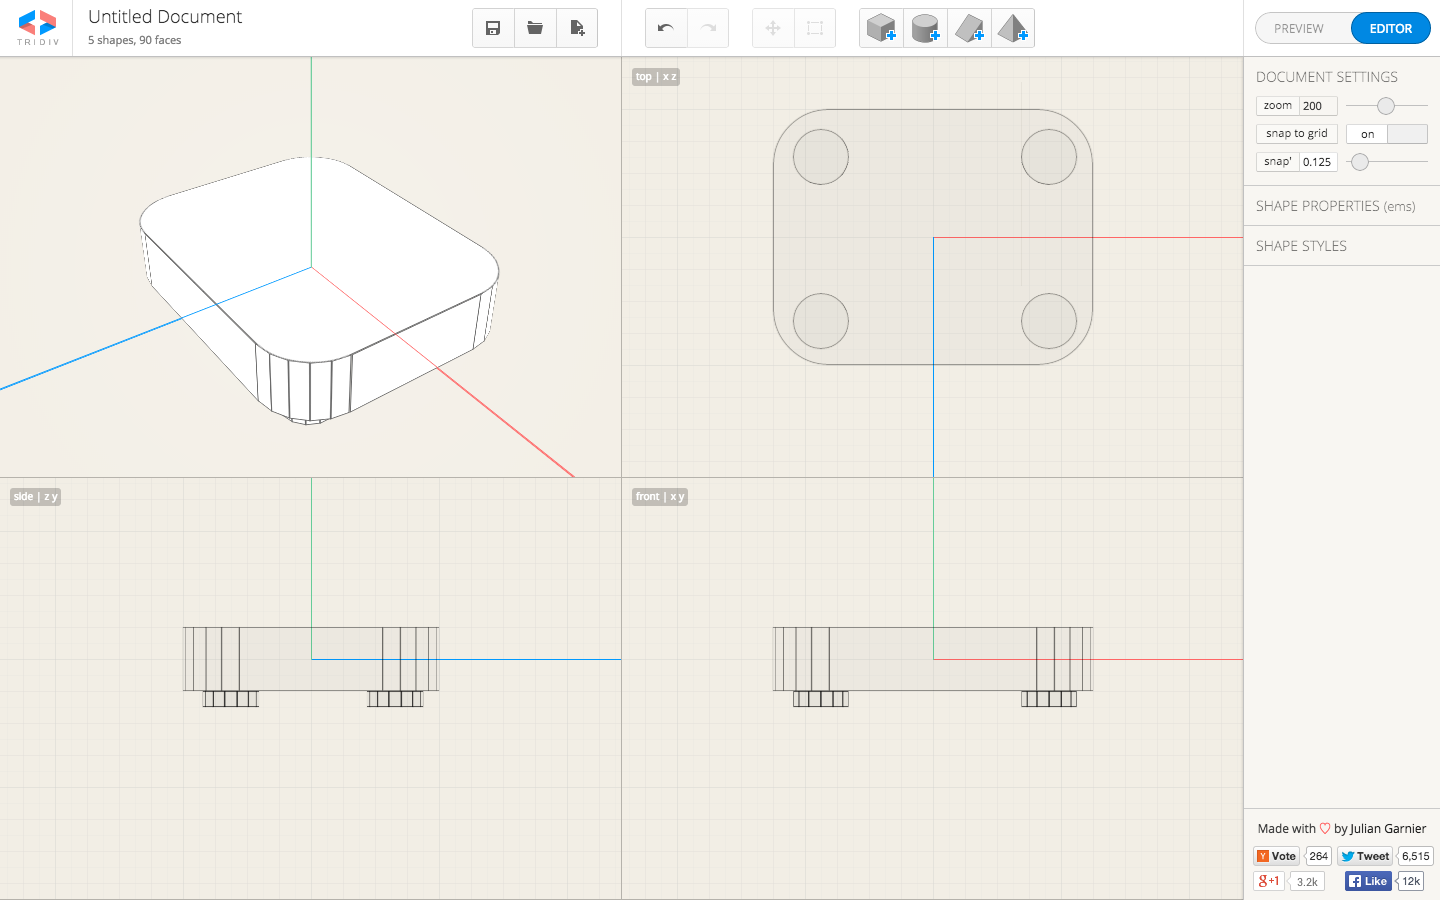
The 3D panel
The top-left panel is like a 3D space. Click your mouse in there and drag around. How's your turntable look?
It should look like this now
Name
The
Parts
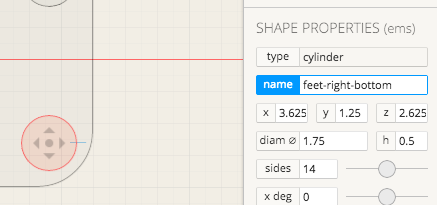
In the same way that you named your base 'base', name the feet 'feet-left-top', 'feet-right-top', 'feet-left-bottom', 'feet-right-bottom'.
Hit 'Enter' (or 'Return') every time to save the name!
Diving in
Now you know, inter alia, how to add cylinders, and tweak their diameter (diam) and height (h).
Using this knowledge, add the cylinders listed on the right. If you get stuck, just ask and we'll be happy to help!
platter: diam = 7; h = 0.5
disc: diam = 6.75; h = 0.25
button: diam = 1.5; h = 0.25
arm-axis-base: diam = 2.25; h = 0.25
arm-axis: diam = 1.375; h = 1
Remember to name your parts. 'platter', 'disc', 'button', etc. are suggestions, but use your own if you like.
When you're done, it should look something like... (See next slide.)
The Arm
& The Head
The Arm: add a Cuboid (like the base), with these specs.:
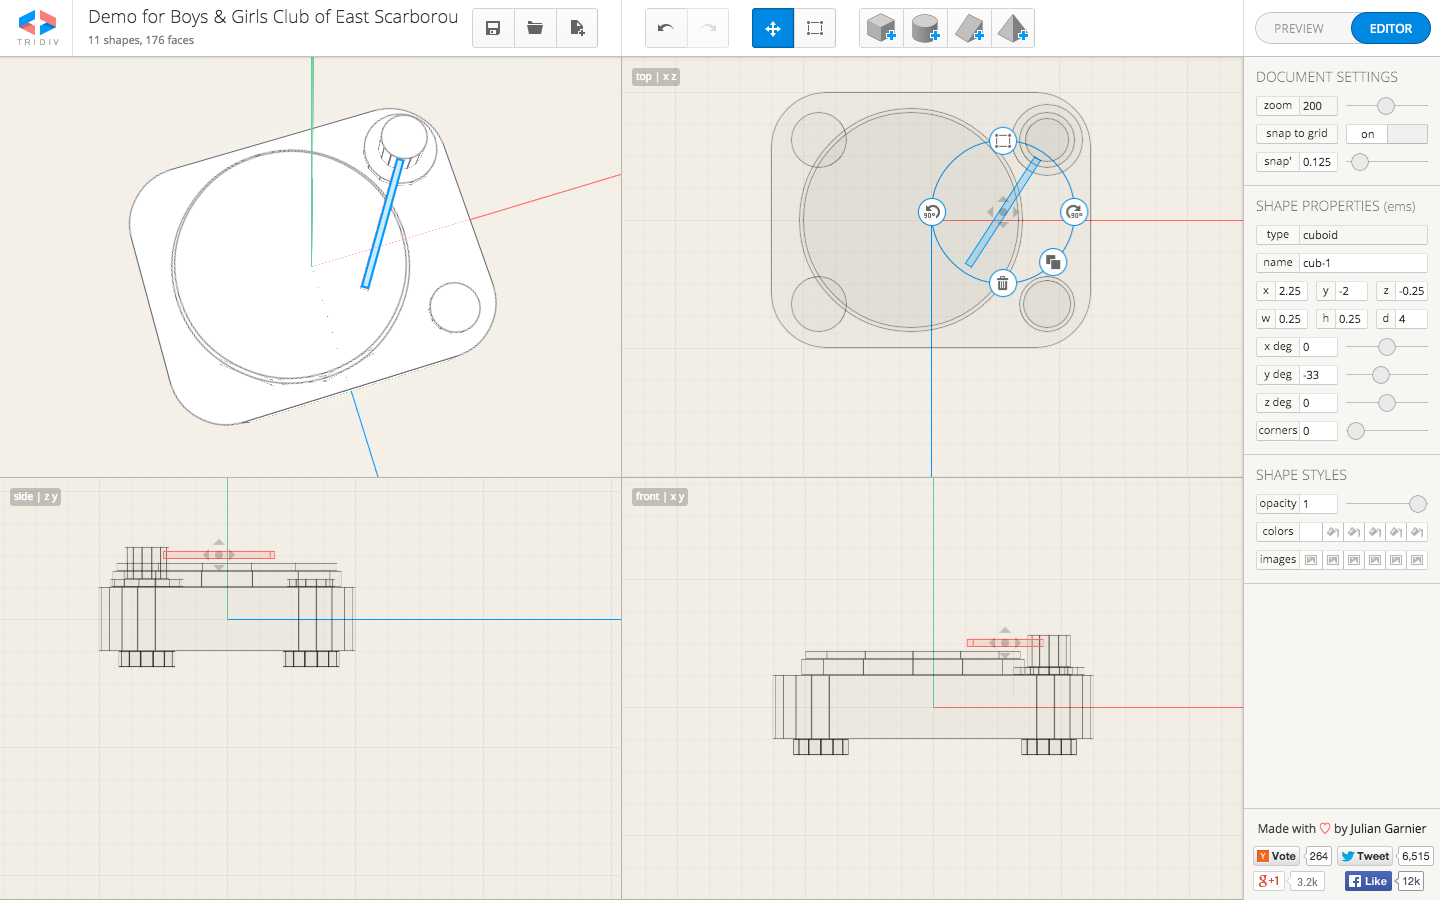
w = 0.25;
h = 0.25;
d = 4;
The Head: add a Cuboid, with these specs:
w = 0.5;
h = 0.5;
d = 1;
y-axis = -33°;
For the arm, you'll also add a rotation of -33° to the y-axis.
The Arm
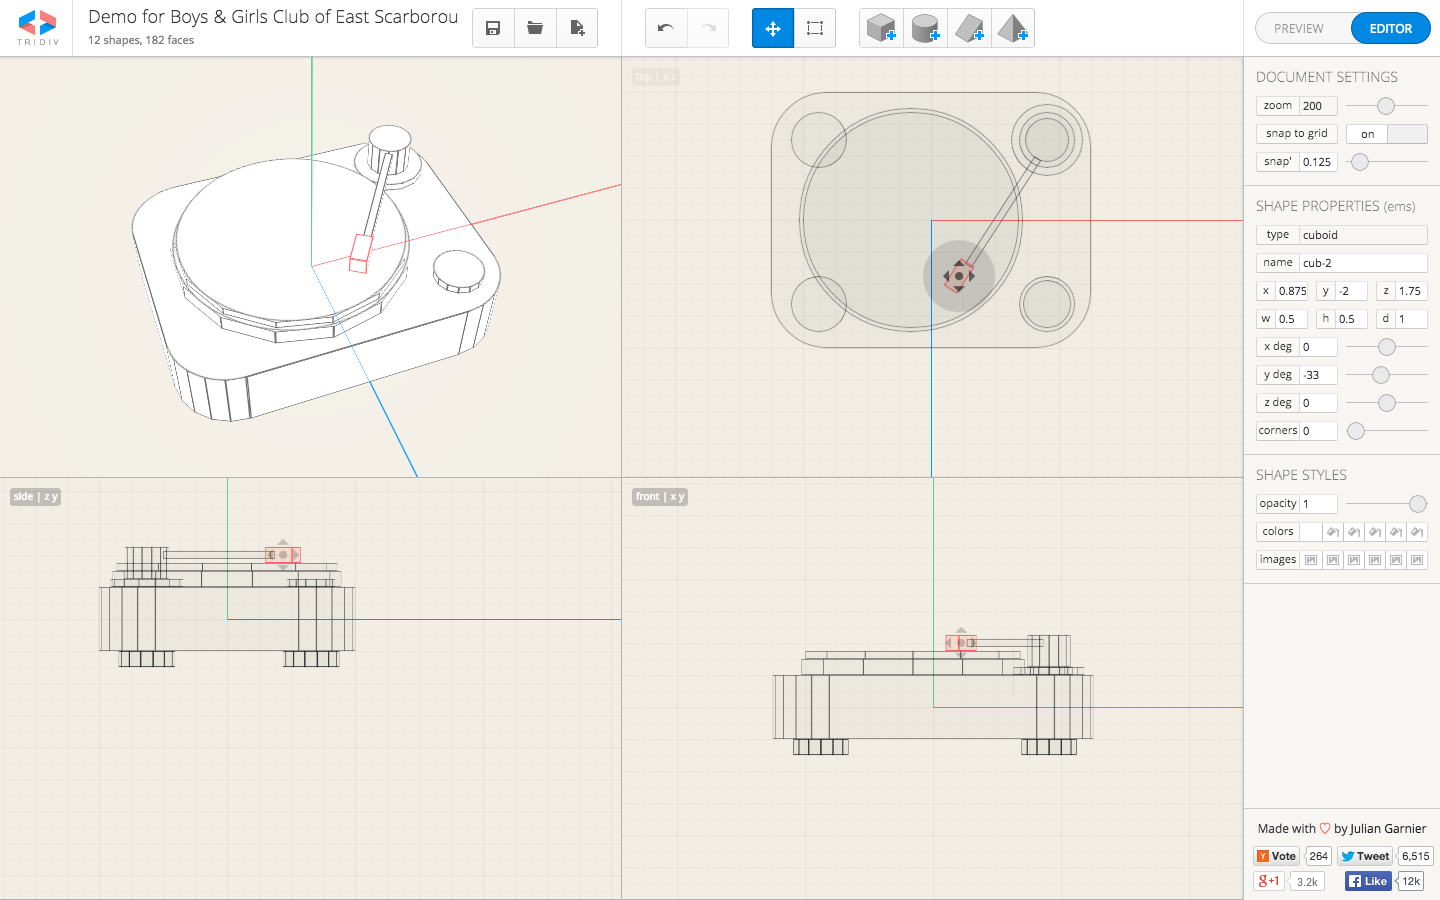
The Head
You should have something like this
Colours & Textures
To add colours, select an object.
Click the Colours box.
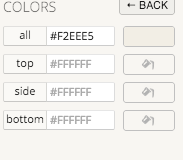
Fill in all with a hexadecimal colour code, hitting Enter/Return to save your colour.... (See next slide for details on hex codes.)
Hexadecimal Colours
Hexadecimal colour codes go like this:
- You have 6 characters that stand for red, green and blue: #RRGGBB.
- Each character takes a value that goes from 'zero to f', like this: 0-9,a-f. 0 is the lowest, f is the highest.
- E.g., #FF0000 will be pure red. #00FF00 is pure green, and #0000FF is pure blue. #000000 is black, and #FFFFFF is white.
- Here are some examples.
So, then
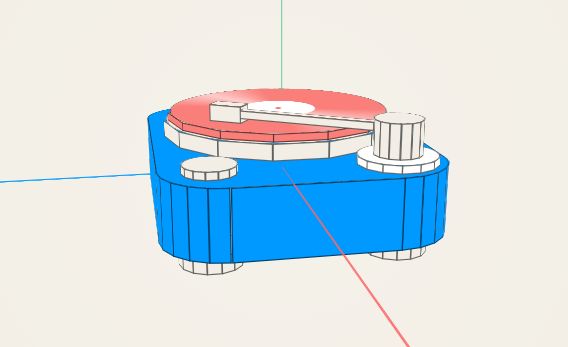
Make your record player colourful
Here are the colours I used:
base: #0099FF
feet, button, arm-axis, arm, head, platter: #F2EEE5
disc: #FA7F7A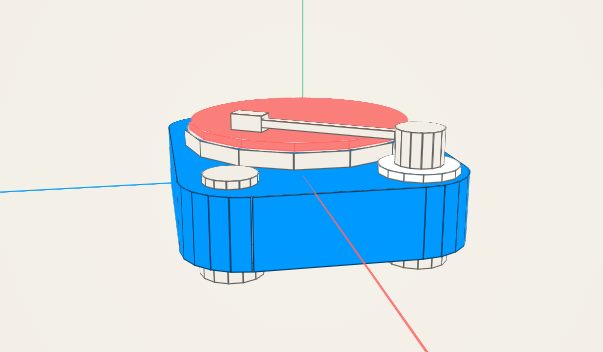
The
Vinyl's Texture
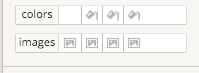
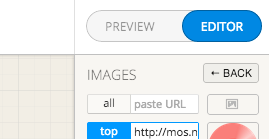
- Select the disc (the 'record'), and click images.
- Paste the URL (the web address) of the image you want to use.
- I'm using one designed for this tutorial: get it here. (I.e., copy the address from the link and paste it into your record's images field, in the top field.
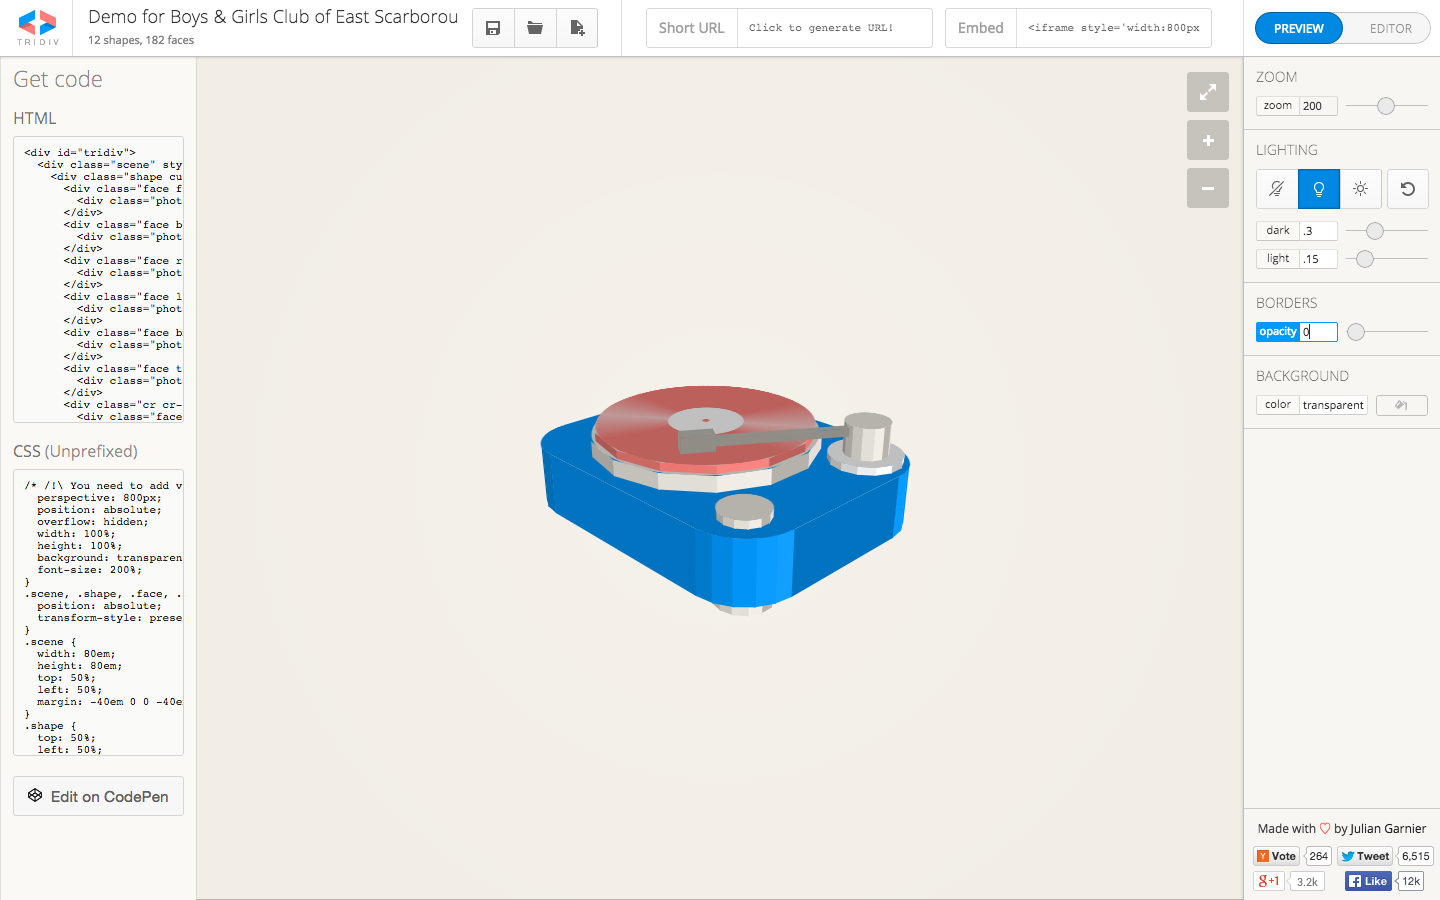
Some Tweaking
- Click Preview
- Set zoom value to 200 (if it isn't already)
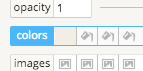
- Go to Borders and turn opacity to 0.
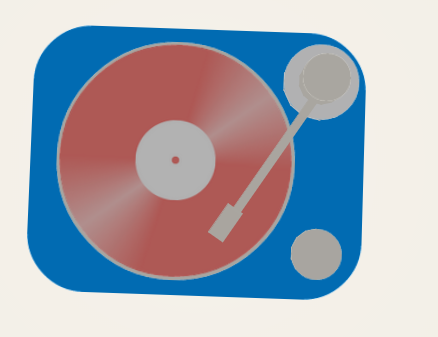
- Manipulate the turntable so that you're looking directly at the top of it.
- Now turn light to 0.
Final Steps

Click the Edit on CodePen button at the bottom-left....
You should be here.
Close the JS tab in the top-right, by clicking X on it.
Style
Scroll to the bottom of the CSS window and add the following code:
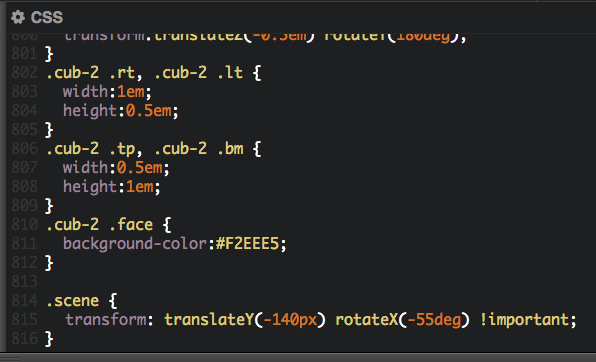
.scene {
	transform: translateY(-140px) rotateX(-55deg) !important;
}
It should look like this:
Add a title
Near the top of your HTML window, right after <div id="tridiv">, add the following code:
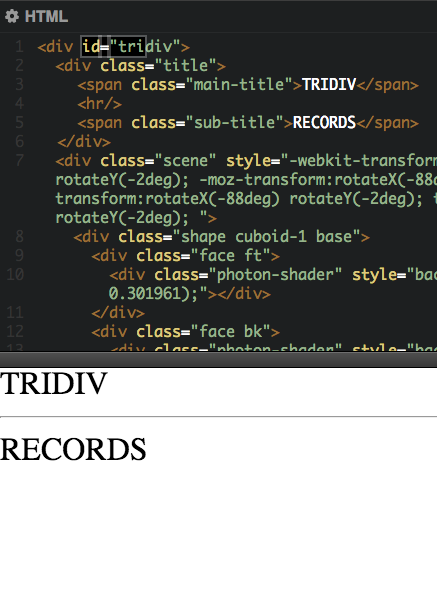
<div class="title">
	<span class="main-title">TRIDIV</span>
	<hr/>
	<span class="sub-title">RECORDS</span>
</div>
<=== It should look like this.
More Style
Copy this code into the bottom of your CSS:
@import url(http://fonts.googleapis.com/css?family=Open+Sans:300);
/* Text block centering + basic font styles */
.title {
	position: absolute;
	top: 50%;
	left: 50%;
	margin: 0 0 0 -165px;
	width: 330px;
	height: 5em;
	font-family: 'Open Sans', sans-serif;
	font-weight: 300;
	font-size: 24px;
	text-align: center;
	letter-spacing: 1.5em;
	color: #0099ff;
}
.title hr {
	border: 1px solid #fa7f7a;
	margin: .75em 0;
}
.title span {
	display: block;
}
.main-title {
	font-size: 2.15em;
}
.sub-title {
	text-indent: .25em;
}
Finally
- A little more style.
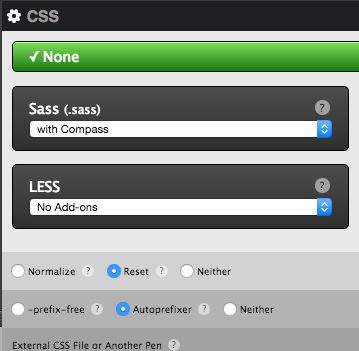
- First, click on the CSS gear icon.
- Click Autoprefixer.
- Now, copy and paste the code on the next page to the end of your CSS.
/* Animation */

.main-title,
.title hr,
.sub-title {
  opacity: 0;
  transform: translateY(300px);
  animation: text-up 5s ease 0s forwards;
}

.main-title  { animation-delay: 0; }
.title hr  { animation-delay: .075s; }
.sub-title  { animation-delay: .2s; }

.shape {
  top: -400px;
  animation: fall 1s ease 0s forwards;
}

.feet-left-top     { animation-delay: 0; }
.feet-right-top    { animation-delay: .15s; }
.feet-left-bottom  { animation-delay: .3s; }
.feet-right-bottom { animation-delay: .45s; }
.base              { animation-delay: .9s; }
.platter           { animation-delay: 1.05s; }
.disc              { animation-delay: 1.35s; }
.button            { animation-delay: 1.5s; }
.arm-axis-base     { animation-delay: 1.65s; }
.arm-axis          { animation-delay: 1.8s; }
.arm               { animation-delay: 1.95s; }
.head              { animation-delay: 2.1s; }
@keyframes fall {
0% { top: -400px; }
100% { top: 50%; }
}
@keyframes turntable {
0% { transform: translateY(0em) rotateX(20deg) rotateY(-520deg); }
60% { transform: translateY(0em) rotateX(-90deg) rotateY(0deg); }
70% { transform: translateY(0em) rotateX(-90deg) rotateY(0deg); }
90% { transform: translateY(-5em) rotateX(780deg) rotateY(0deg); }
95% { transform: translateY(-4em) rotateX(620deg) rotateY(0deg); }
100% { transform: translateY(-4.5em) rotateX(660deg) rotateY(0deg) ; }
}
@keyframes text-up {
0% { transform: translateY(1000px); opacity: 0;}
66% { transform: translateY(1000px); opacity: 1;}
72% { transform: translateY(-10px); opacity: 1; }
78% { transform: translateY(20px); opacity: 1; }
93% { transform: translateY(-10px); opacity: 1; }
94% { transform: translateY(30px); opacity: 1; }
100% { transform: translateY(10px); opacity: 1;}
}Part 1
Part 2
And with a bit more work, you'll have something like this.
TT: 3D Logo with Tridiv
By Samuel Allemang
TT: 3D Logo with Tridiv
How to create a 3D logo. Adapted from Net Magazine. Part of Tech Tuesdays at the Boys & Girls Club of East Scarborough's Rogers Raising the Grade program.


